Tuesday, September 27, 2011

Grilled peaches with honeyed marscapone and pistachios


What do you take to a friend's house for dessert when sugar and wheat are off the menu?  My thinking on this score starts with fruit.  It's not yet Summery enough for fruit salad in my humble opinion, and given that I didn't want to add sugar I thought that whatever fruit I used needed to have its own natural sugars caramelised, to really get the most out of them.  Then I was at (the Brunswick fresh food mainstay) La Manna on Saturday, and they had their first boxes of peaches.  So grilled peaches it was!

Twenty minutes from start to finish, highly affordable, delicious and about as healthy as desserts can get.  People who thought they didn't like peaches, will discover they do like peaches after all!*


Ingredients:
  • Peaches, halved
  • 250g marscapone
  • 1/4 cup orange blossom water
  • 1/4 cup warm water
  • Honey
  • Vanilla essence
  • Cinnamon
  • Pistachios


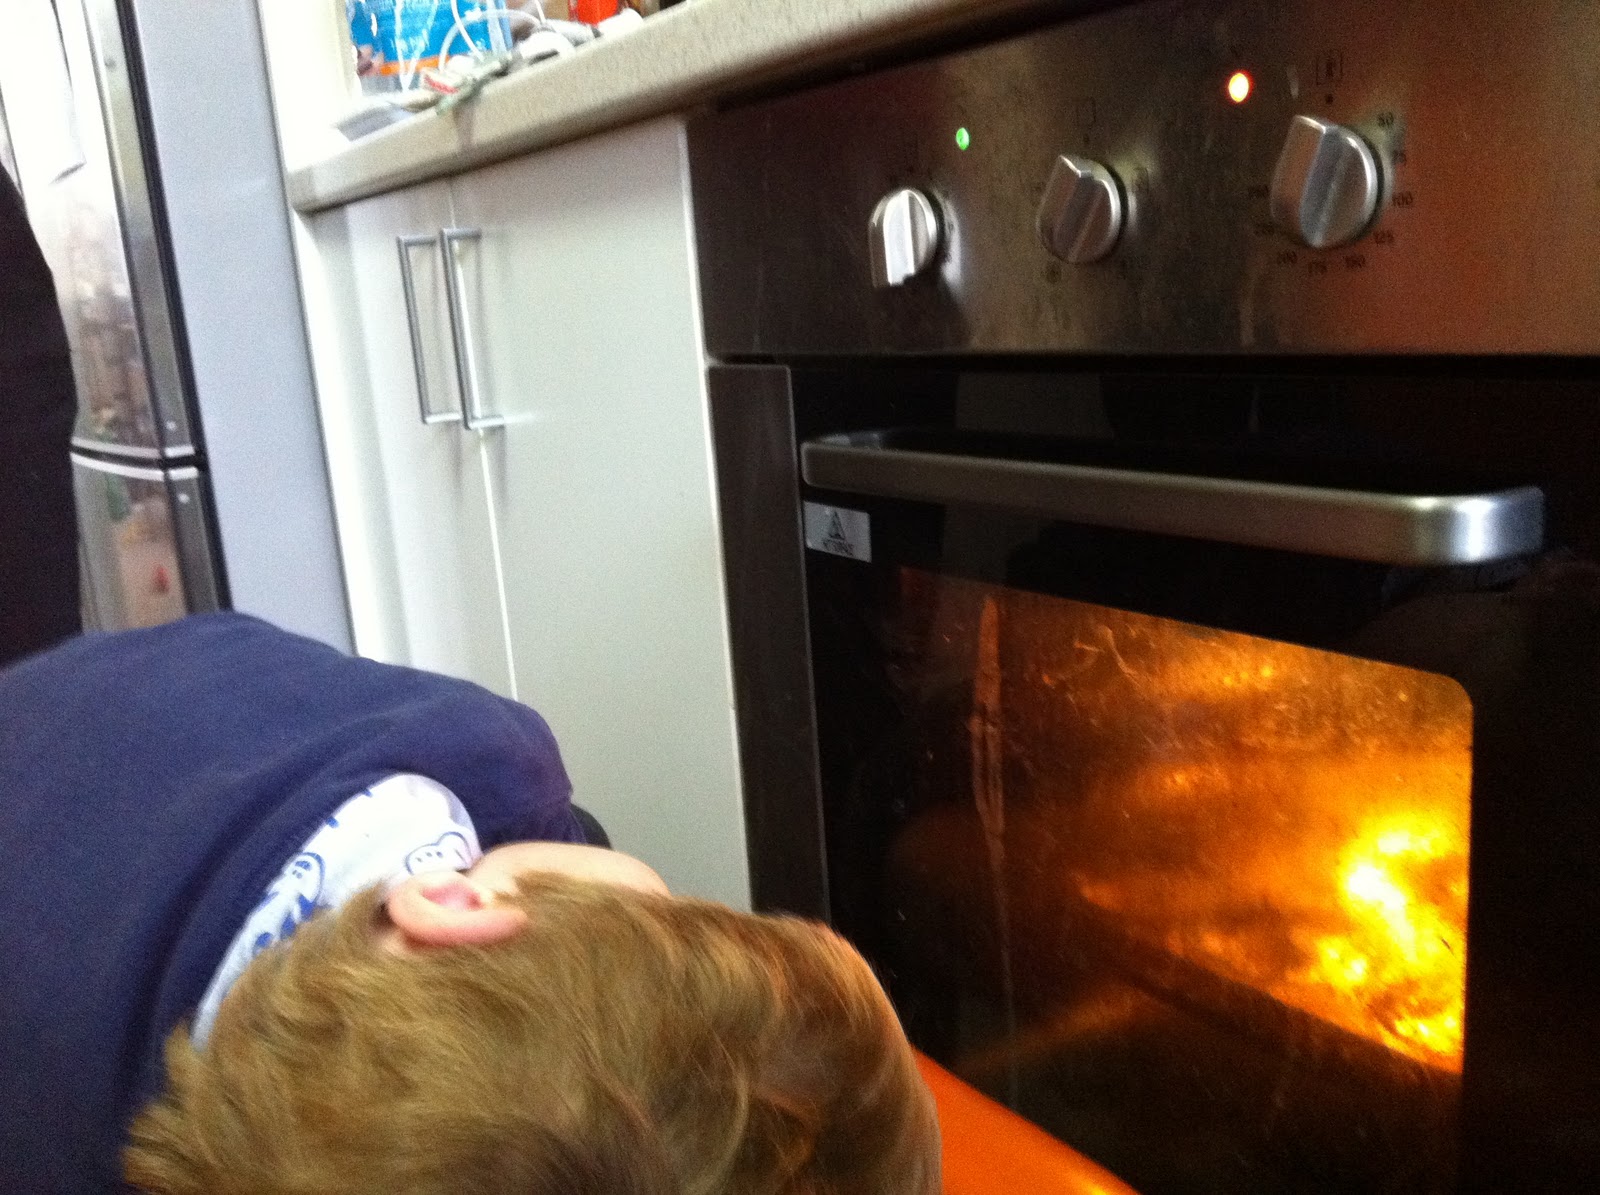
Place your halved peaches cut side up in a baking dish.  Mix the orange blossom and warm water, and a teaspoon of honey, and sprinkle over the peaches, allowing them to sit in the liquid.  Place under a hot grill for 10 minutes, until the the peaches are soft and beginning to char.


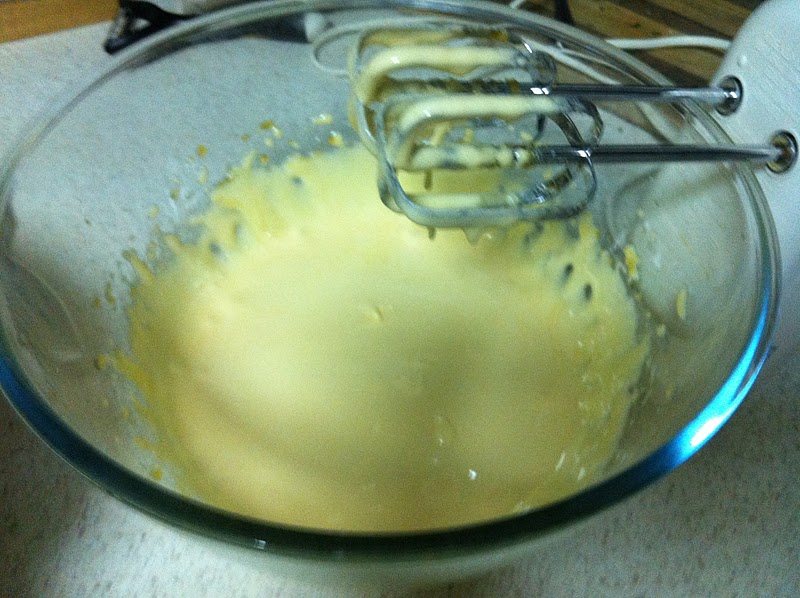
Place the marscapone, two tablespoons of honey, two drops of vanilla essence and a shake of cinnamon in a bowl and whisk until thick and fluffy.


Serve the peaches with a little of the syrup and juices, with a dollop of the marscapone and chopped pistachios.  Beautiful!


*This really happened!

Sunday, September 25, 2011

Jaffa Cake


I magnanimously volunteered to bake for our weekly Work-In-Progress meeting, because I was desperate for an excuse to make this cake, and Leith has (very wisely) asked that I don't bake enormous things just for the two of us, as we'll only eat them and head further down the road to Roly-Poly Town (let's just assume I'm paraphrasing).


But my oh my, this cake!  I love Jaffa.  It's one of my all-time favourite flavours that is one half chocolate.  You know what I'm saying, right? Choc mint is wonderful, mocha is devine, choc strawberry is good but nothing to write home about, choc ginger is massively under-rated, and jaffa or choc orange? It's the bomb!  So in hunting around for a jaffa cake recipe, I discovered a slightly different interpretation of a Jaffa Cake over here (where many good recipes reside, incidentally), and decided that this was the one! 

It's basically a super moist orange syrup cake, with a delectable chocolatey glaze.  My workmates approved.

Ingredients (Cake):

  • 6 eggs, separated
  • 1 1/2 cups plain flour
  • 1 1/2 cups caster sugar
  • Juice and rind of one orange
  • 185g butter
 Syrup:
  • Juice of 3 oranges
  • 2 tablespoons brandy
  • 2 tablespoons caster sugar
Delicious chocolatey glaze:
  • 200g dark chocolate
  • 1/2 cup sour cream
  • splash of strong black coffee


Heat the oven to 160 degrees (fan forced, or 180 regular).  Grease a 23cm round cake tin and line the bottom.  Beat the sugar into the egg yolks until pale and fluffy.    Add the sifted dry ingredients, and the orange juice, melted butter and rind and fold into the mixture with a wooden spoon.  In a clean, dry bowl, beat the egg whites until stiff, and fold these into the mixture.  Then pour into your tin and bake for 50 minutes.


Prepare the syrup by stirring ingredients together in a small jug for about 30 seconds or until the sugar is dissolved.  When the cake is ready, allow to cool in the tin for a few minutes and on a wire rack for another couple of minutes.  Then carefully place the cake back in the tin, and spoon the syrup over the top.  Leave to cool completely.


When the cake is completely cool, prepare the glaze by melting the chocolate (this can be done over water on the stove, or in the microwave, as long as you check it every 15 seconds or so to ensure it doesn't burn), and mix in the coffee and sour cream.  Smear this over the whole cake and put the cake in the fridge - the glaze will set to a semi-firm consistency.


Then take into your meeting and scoff it right down.  Your colleagues on the phone line in Sydney will hear the scrape of forks on plates and know, deep in their hearts, that the Melbourne office is totally winning at meetings.


Monday, September 19, 2011

Chili con Carne


Saturday I had a meat craving.  Bad.  I also had chipotle peppers in sauce, turtle beans, corn chips and a whole afternoon at home.  So I made Chili con Carne.  I'd never made it before so I looked up a bunch of online recipes and deduced that if I made it just like bolognese only kinda Mexican and spicy, then everything would work out for the best.  This turned out to be pretty sound logic.  I wolfed a plate and a half, fed as much again to two hungry men, and have half a pot full for lunches tomorrow.  I plan to be the envy of the office (vegetarians excluded)!

Ingredients:
  • 800g lean minced beef
  • two tins crushed tomatoes
  • 4 chipotle chilis in sauce
  • 1 large onion
  • 2 garlic cloves
  • bay leaves
  • cinnamon quill
  • 1 teaspoon salt
  • 1 cup turtle beans
  • 1 teaspoon cayenne pepper
  • 1 large tablespoon anchio chili powder (mild chili)
  • coriander
  • splash of tequila
  • rice, grated cheese and corn chips to serve


Finely chop the garlic and onions and sautee until golden in a decent amount of oil.  Add the meat and brown thoroughly. 


Add the two tins of chopped tomatoes and all your chilis and spices* and stir through.  Then add your beans and do the same.  I also added about a shot of tequila, just because.  Cover and simmer for as long as you have - for me this was about 4 hours.  I checked on it periodically and added a cup of water to prevent it drying, then simmered it down finally until it was good and thick.  The colour will bleed from the black beans and turn the whole thing into a lovely dark stew.


20 minutes before serving, prepare your rice and grate your cheese.  Immediately before serving add the finely chopped coriander, and then serve over rice with the cheese and smashed up corn chips on top.  By this time the house will have smelled of Chili for hours and you may find yourself hoovering it into your face three times faster than your friends.  This is okay.


*Anchio powder is a wonderful thing.  It tastes hugely of chili, without the heat.  So by adding enormous quantities to dishes they taste wonderfully of chili, but you can still control how hot they actually are by adding additional hot chili or cayenne pepper to your tastes.  I highly recommend it!

Saturday, September 17, 2011

Leith's Totally Authentic Baked Doughnuts (with special guest doughnut makers Nina and Noah)


I have a boyfriend who can whip up a batch of home-made doughnuts in under 20 minutes.  I'm a pretty lucky lady.  I'd asked him to guest-blog the doughnuts a while back, and he agreed!  Then I was pipped this week by Joy the Baker who produced some pretty smashing looking specimens.  But I have to complete this post all the same, because last Sunday Leith made doughnuts with extra help from mini-chef extroadinaires Noah and Nina.  This was the best after lunch activity possible, and has produced a gamut of way-too-adorable-for-words photos as well. 

They also have a proper glaze that sets.  I was beguiled by how Leith made this the first time I saw him do it.  Finally, this is a vegan recipe, and while I'm all for vegan baked goods I must admit I find some way too heavy on the oil.  These doughnuts however are 100% perfect. Kids love doughnuts and grown-ups love them too, so everyone's a winner.


Ingredients - Dry mix:
  • 1 cup SR flour
  • 1/2 cup caster sugar
  • 1/4 teaspoon salt
  • 1/4 teaspoon nutmeg
  • pinch of cinnamon
Wet mix:
  • 1/2 cup soy milk
  • 1/2 teaspoon apple cider vinegar
  • 1/2 teaspoon vanilla extract
  • 1 teaspoon cornflour with a dash of water
  • 4 tablespoons nutalex
Glaze:
  • 1/2 cup caster sugar
  • large tablespoon of cocoa
  • 1 tablespoon soy milk
Heat the oven to 180 degrees.  Grease your pan. 


Mix all your dry ingredients in a bowl.


Put all your wet ingredients in a saucepan on the stove on a medium heat, and stir until the nutalex is completely melted and mixed in.


Add the wet mix to the dry mix and stir vigorously.  Nina conducted several very important taste tests for quality control throughout this phase.  She approved!


Pour into your super excellent doughnut shaped pan!  Then bake for 20 minutes.


The waiting can be excruciting.


Remove from the oven and cool the doughnuts on a wire rack.  While they are cooling, put your glaze ingredients in a small low pan on the stove and mix over a low heat.  Pour this into a small wide bowl.  Prepare your hundreds and thousands in your chosen colours in two similar bowls.


Then dip a doughnut in the glaze, then into the hundreds and thousands.  Voila! Doughnuts for all, and three for Noah! (Noah's mum said two.  Noah's mum was probably right on this one).


 Sometimes doughnuts will inspire a doughnut dance.  This is totally normal and to be encouraged.
And that is how Leith, Noah and Nina made awesome doughnuts, which I helped them eat.