Saturday, January 28, 2012

Sweet Mango Sticky Rice


The return to work has happened and the new year's for healthy work snacks has also taken place.  And my brother recently bragged to me about having made what sounds like a pretty amazingly delicious savoury sticky rice, which got me thinking.


And THEN I discovered the local Asian grocers has a steady stock of frozen banana leaves.  This sealed the deal.  Although I was not interested in savoury sticky rice as a work snack.  I was interested in sweet and fruity sticky rice for the 4pm slump.  And since it's Summer here in Melbourne and mangoes are in season, there was really no need to consider any other fruits, what with mangoes being king of the fruits.

So this sticky rice is remarkably easy.  You need to start it a day in advance, but apart from that it's a breeze.  I now have a stash of single serve parcels in my freezer that I'm chomping through at my leisure.  And because it's sticky rice, you can microwave it to defrost and warm, and it only gets stickier and more delicious.

Ingredients:
  • 2 cups medium grain rice
  • 2 cups coconut milk
  • 2/3 cup palm sugar
  • 1 mango
  • chia seeds
  • banana leaves

 One day ahead of time, soak the rice in cold water and leave overnight.


The following day, drain the water off the rice and place in a large pot.  Add the coconut milk and sugar and bring to a medium heat.  Stir the rice over the heat so it doesn't stick and burn, while it absorbs the coconut milk, as though you are making a sweet, sticky risotto.  Once it is thick and very risotto like, turn off the heat and leave to cool.


At this point the rice won't be cooked through yet, but that's ok.  We're not done yet!

While the rice cools, slice the mango into long thin strips.


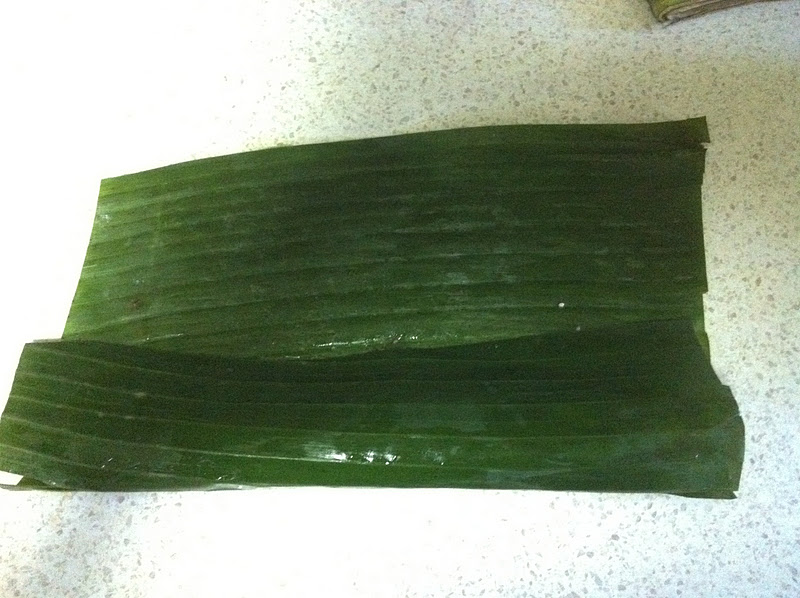
Prepare your banana leaves (which are enormous) by cutting them into roughly A4 sized pieces, trimming any manky edges and washing them.


Then prepare you sticky rice parcels.

First lay your banana leaf down.  Then place a sprinkling of chia seeds in a 5cm line down the centre.


Place a spoon of the rice over the chia seeds, followed by a sliver of mango, then another spoon of rice.


Then fold the banana leaf over the rice, pressing it together firmly, fold the sides in and roll over until sealed.


Repeat this for all your parcels, then place them in steaming baskets and steam over water for 40 minutes.


Yum yum yum yum yum.

Sunday, January 22, 2012

Chocolate, ricotta and blueberry cake with chocolate-yoghurt icing


I was in Brisbane last week when my boss arrived home from his overseas trip and emailed my office to say there were fancy chocolates in the kitchen for whoever wanted them.  I wanted them! But I was in stupid Brisbane.  So I email-bribed my workmates with the promise of baking, and lo, they saved me some chocolates.  So today I am making good and baking a cake for Monday afternoon. 


Because it is my cake and my decision, the cake had to involve chocolate.  But I didn't want it to be too sweet, nor too dense.  So I looked up cakes with fruit.  I was hoping to find something involving peaches, but then I stumbled upon a recipe involving blueberries and ricotta and my decision was made.  However, the original said to dust with icing sugar, and I knew I could do better than that. So I added a ganache-like icing made with yoghurt for some extra tang.

Ingredients:
  • 2 cups SR flour
  • 1 cup castor sugar
  • 1/4 cup cocoa
  • 250g ricotta
  • 100g butter
  • 1 cup hot water
  • 2 punnets blueberries
Chocolate yoghurt icing
  • 1 cup dark cooking chocolate pieces
  • 1/4 cup greek yoghurt

Grease a 22cm cake tin and heat the oven to 160.  Sift your flour, sugar and cocoa into a large bowl.  Melt the butter (I do this in the microwave, being careful not to have it explode) and add with the water and ricotta to the dry ingredients. Stir thoroughly until all ingredients are mixed through, especially the ricotta.  Then fold in one cup of the blueberries, reserving the rest for decorating the finished cake.


Place in the oven for an hour, or until a skewer inserted comes out clean (if your oven isn't fan forced you may want to cook it for an extra 15 to 20 minutes). Once cooked, cool in the pan for 5 minutes then on a rack.


Prepare the icing by melting the chocolate and stirring through the yoghurt.  Smooth over the cake while pliable and glossy, then place in the fridge to set. 


Top with the remaining blueberries to serve.


Very impressive for such an easy cake.


Monday, January 9, 2012

Tortes de Acietes


My (super talented/gorgeous) friend Leanne put me onto the most glorious Spanish olive oil biscuits a few years ago.  Called Tortes de Acietes (cakes of oil!) they are made in a factory in a town in southern Spain according to the same recipe first used by a lady named Ines Rosales over 100 years ago.  In Melbourne, you can buy them at Casa Iberica, the Spanish grocers on Johnston St in Fitzroy for the cost of $8 for 6 biscuits.  

The thing to know about these biscuits is: they are so so simple.  Their incredibleness lies in the way they ABSOLUTELY NAIL the key elements of their simplicity.

  1. Texture - they have this snap when you bite into them.  Flaky, crunchy, light yet with substance. The snap is very important indeed.
  2. Just a hint of sweetness - They are extremely plain but dusted with sugar so that you get a hint of sweetness that isn't in anyway overpowering.  So you can eat heaps.
  3. Fennel seed - I may have mentioned elsewhere on this blog my devotion to fennel and fennel-related things, with their subtle, aromotic aniseed.
  4. They are JUST BRILLIANT with a cup of tea.

Today being my last day of holidays, I decided I need some to get me through my re-insertion to working life.  So I rode my bike to Casa Iberica.  But when I got there the man said they didn't have any deliveries over the holidays. Needless to say, I was totes devo.

So I decided to attempt them. This was no easy task, as there are few recipes around on the internets, and the original Ines Rosales recipe is fiercely guarded by those Spanish pixies who continue to work her magic.  After scouring various other bloggers' attempts, I found one I liked the look of and tweaked it very slightly.  And it more or less worked! Oh, fabrous day!  I have texted Leanne.  There shall be cups of tea aplenty.


Ingredients:
  • 2 cups strong baking flour
  • 3 tablespoons caster sugar
  • 1 teaspoon baking powder
  • pinch salt
  • 100 ml extra virgin olive oil (plus extra for brushing on the tortes)
  • 100ml orange juice (pulp free or strained through a sieve)
  • orange rind
  • fennel seeds
  • raw sugar

Heat the oil over a low heat with the orange rind.  This will allow the orange oil to infuse in the oil.  Once the rind starts to brown remove it immediately, and turn off the heat.  Crush a teaspoon of the fennel seeds in a mortar and pestle and add to the cooling oil.  Once cool, add the orange juice to the mix.


While the oil is heating, sieve the flour, baking powder, sugar and salt in a large bowl.  Then add the wet mixture and mix into a dough.  Form into a bowl, cover with plastic wrap, and leave for 30 minutes.


Heat the oven to 225 degrees C.  On a lightly floured surface, take a small ball of the dough (about a walnut size) and press down.  Then, using a floured rolling pin, roll out until extremely thin (a millimetre or less).  Brush liberally with olive oil, sprinkle thoroughly with raw sugar and add a few fennel seeds.  Then place on a tray lined with baking paper and put in the oven.


These only need to bake for five or six minutes before they will start to brown at the edges and burning is around the corner, so stay vigilant! I discovered that the time to roll out three more tortes was the amount of time needed to bake one round.

Leave them to cool - this is when they will harden into that wonderful, cracking, snapping morsel you have been dreaming of all day.  Then eat them, one after the other, incessantly, because of how delicious they are and how greedy you are and it's the last day of holidays and you don't care what anyone thinks of you! You're free! FREE TO EAT TORTES!